- Posted on
- • Other Electronics
Fun With The Sun - The Solar Monitor 5 Million! (Experiment) Pt.2
- Author
-
-
- User
- Mr Blinky
- Posts by this author
- Posts by this author
-
I have been meaning to write an update as I have added a couple of new sensors. One of which is my very own invention - straight from the old grey matter. I have also made some improvements and things seem pretty stable. I have improved the web pages for displaying the data and is now easy to go back and forwards day by day to view the data.
For some reason the ESP32 started counting something like 10x the actual counts from the counter. I think this happened after I added an AS7341 sensor, or something. I have had other issues with the ESP32 slowing to a crawl. I guess this is what happens when you cram a boat load of sensors on one small MCU. Or, my less than optimal programming skills. Or maybe a bit of both. Anyway, I added an Arduino Pro Mini to offload some CPU cycles (I think more like timing locks or something from the sensor libraries) and run the AS7341 and the Geiger counter on the pro mini, and that sends the data to the ESP32. It all works very nicely now. The little spikes that were showing on the old IR sensor have gone away. I don't know how. I didn't do anything. I must have done something, but I don't know. I also cut away at the plastic cover on the RadiationD-v1.1 and moved the sensor board back so the GM tube gets more light now and isn't affected by the plastic/acrylic/Perspex/Chinesium see-through stuff, whatever it is.
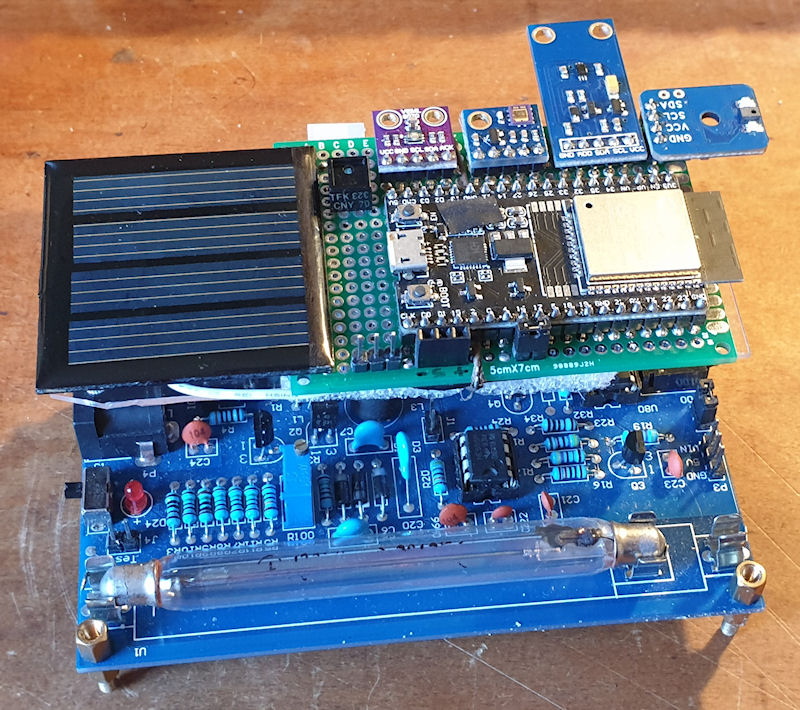
This is what the array looks like now. not much different, but better placement allowing the GM tube more direct sun light. The new AS7341 sensor is mounted at the top right.
The AS7341 sensor is like an 8-band colour spectrometer. It picks up 8 individual specific colour frequencies across the visible band. It also has a 'clear' sensor and a near-infrared sensor, making up the 10 bands. The 'clear' sensor is one that receives all the light spectrum and isn't filtered. The 8 colour bands are the same sensor but with a colour filter for a specific colour frequency. And NIR is just that. Capturing the data from this sensor is easy, but displaying it is not. I think I need to create some kind of 3 dimensional graph, so that will come later. For now though you can see an example of the data on a 2D graph. It is interesting to see the different light levels of the different colours/frequencies. These graphs are fairly parallel but some days haven't been quite so. The link for the data/graphs etc is at the bottom of this post if you want to have a look.
 Above is the 8 bands of visible light from the AS7341.
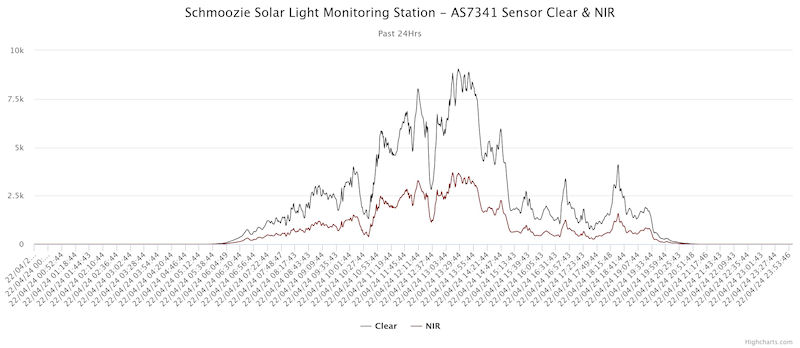 And the 'clear' and NIR from the AS7341
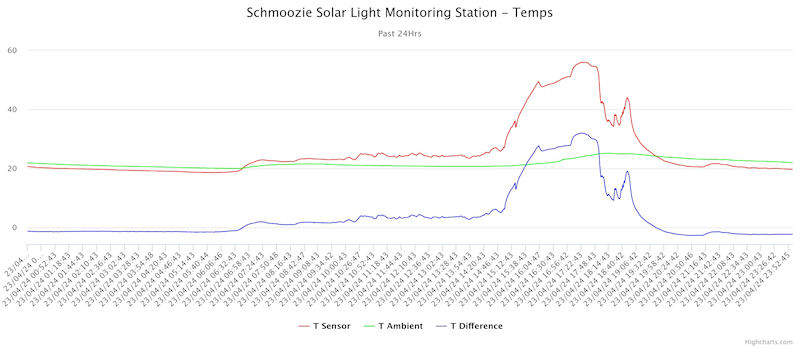
The second sensor is for temperature. I thought it would be nice to be able to actually put an indication to how hot the sun light is. I figured I would need to build some kind of solar heat collector. I went for a small glass sample bottle with a Dallas 18B20 temperature sensor glued to the inside and then the rear inside half of the bottle painted black with matt black paint. It works very well so far although I have had to make some changes. There is 2nd Dallas 18B20 temp sensor that I mounted behind the main sensor and tried to shield the sun from that, but it didn't work very well and was getting too hot too fast. I removed the 2nd sensor from behind the first one and it is now stuck to the wall in my office. The temp from that is much more stable now although does rise a little during the day and also when the heating is on. With the two temperature sensors I can take one from the other to give a temperature reading that would be ## degrees above ambient. You can see in the graph below. It does need improvements as I think some of the heat collected is radiating out so my plan is to insulate it. The Dallas 18B20 ranges from about -125 to +125 degrees Celsius with +-0.5 degrees accuracy. It is factory calibrated and simply gives the reading so is very easy to integrate. It uses just one wire and they can be paralleled up on the same wire, so very easy to use.
This is the first iteration of the sensor and you can see the 2nd Dallas sensor at the rear. Now it is just the bottle I plan to make a box, insulate it a lot and stick the bottle sensor in the middle of all the insulation so should stop some heat radiating away.
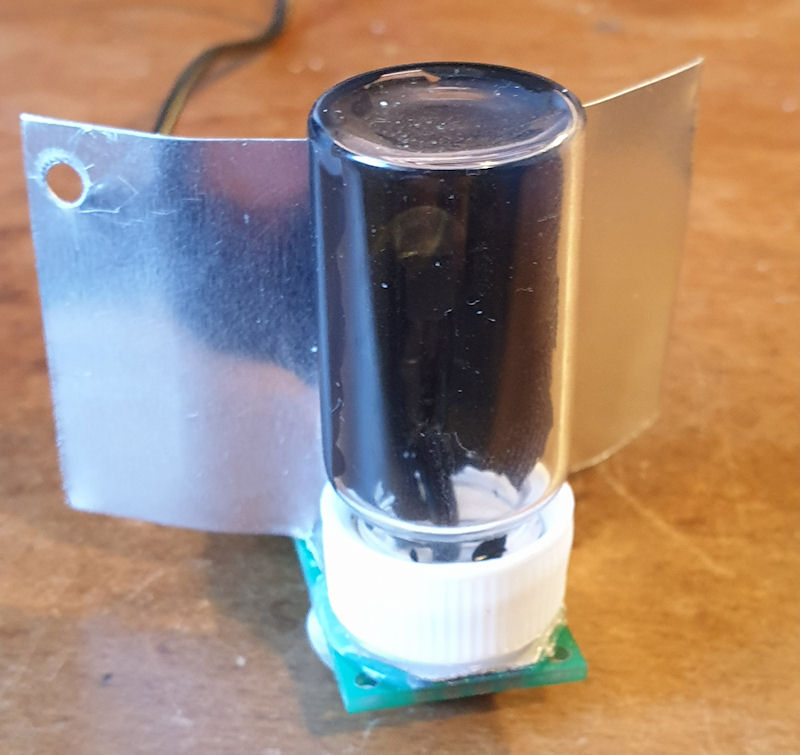
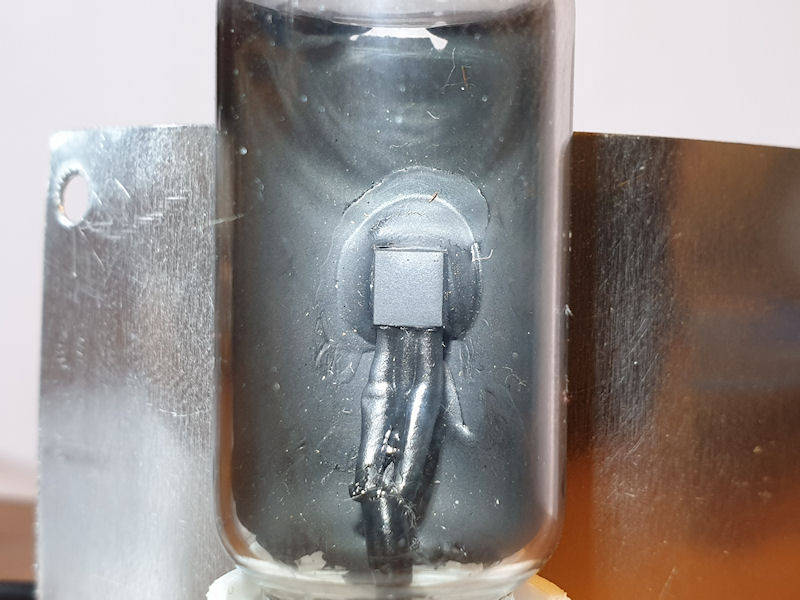 The Dallas 18B20 is glued to the inside of the bottle with epoxy and then painted with matt black to try and absorb as much heat as possible.
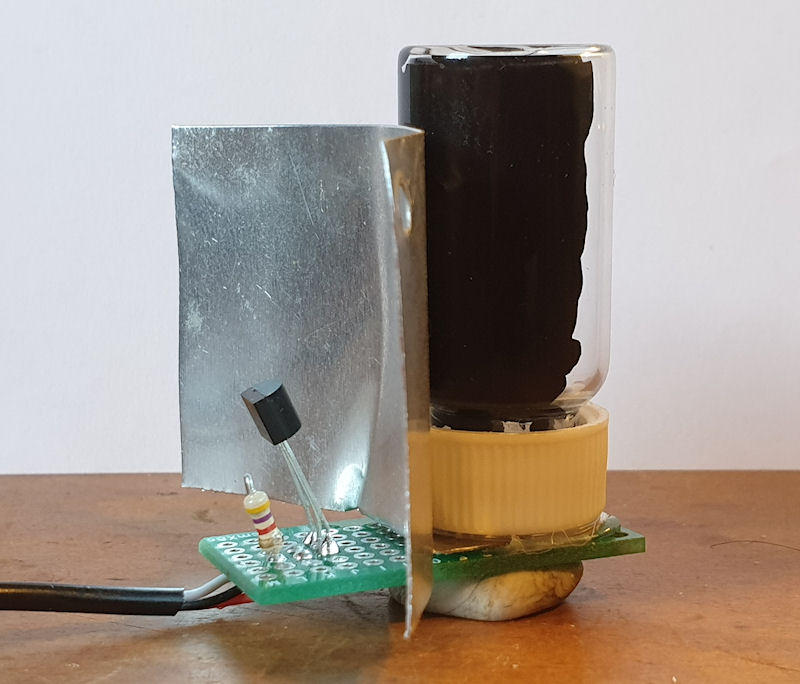 You can see the 2nd Dallas 18B20 mounted behind the bottle sensor. This has now been changed and the 2nd sensor is stuck to my office wall where it gets a much more stable temperature reading.
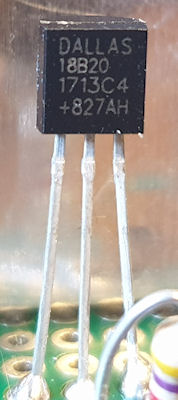 This is the Dallas 18B20 temperature sensor.
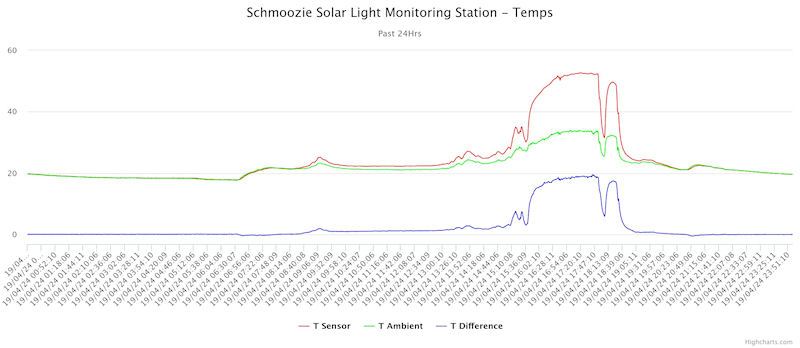
This is the kind of data I am getting from the temp sensors. It clearly shows a massive difference between ambient (in the shade) and direct sun light. This graph is from before I moved the 2nd sensor on to my wall and you can see it is affected by the sun light. The later graphs (on the web page - link below) show it a lot more stable, but does give a little deviance from the bottle sensor. I'm not too bothered about a +- 2 degree deviance as when the sun hits the bottle sensor it shows a large difference.
This is after moving the 2nd temp sensor. The ambient temperature is much more stable now but does give some deviance. Getting a decent solid ambient temp reading is very hard as the sun heats up my house, and so does the heating, making the ambient change a bit. As the (bottle) sensor is in my window, opening my windows causes the temperature of that sensor to drop. Mega insulating the bottle sensor should alleviate some of this.
The old IR sensor stopped showing the little spikes for a reason I do not know, but I don't mind the results. I have actually started to appreciate the data that little sensor gives as it ramps up quickly as the sun comes up and ramps down quickly also, as the sun goes down. Comparing the data from that IR sensor to the sunrise/sunset times it appears as though the IR sensor is picking up daylight a few minutes before the actual sunrise time and then falls to 0 a few minutes after sunset. It is basically an indicator for any light and no light. I did think about swapping it for a different one, but I think I will keep this for now.
What next? For now keep gathering data, making tweaks and changes to give the readings better validity. It would be nice to get hold of a calibrated UVA/UVB meter so I can calibrate my own sensors against that. Good UVA/UVB meters aren't cheap to buy, but I may be able to hire one for a week. It's a thought. I have ordered some more sensors to have a look at. These are:
TEMT6000 - Described as an ambient light sensor. Not sure what this will do/be like. I suspect something similar to the old IR sensor, but more in the visible range. TCS3472 - An RGB Colour Sensor. From the datasheet: The TCS3472 device provides a digital return of red, green, blue (RGB), and clear light sensing values. An IR blocking filter, integrated on-chip and localized to the colour sensing photodiodes, minimizes the IR spectral component of the incoming light and allows colour measurements to be made accurately. GUVA-S12SD - Analog UV sensor module. It uses a UV photodiode, which can detect the 240-370nm range of light (which covers UVB and most of UVA spectrum). VEML7700 - I think this is similar to the VEML6070 (UVA) but gives the actual lux value.
Once I receive the new sensors I will get them up and running on another ESP or something before integrating them into the array. That is if I plan to use any after testing them. I am also still looking at ways I can use my colour spectrometer and capture the spectrum of daylight at 5/10 minute intervals. I could just throw up another PC to run it and use some image grabbing software to capture just part of the screen. That said, I am conscious of electricity consumption these days, so burning 100 watts of electricity just for that is not really justifiable. I wouldn't mind so much at about 15-20 watts, if there is a PC out there that will run at that? Raspberry Pi is also an option, but not sure if I could get my USB spectrometer working with that. I still need to look at the TCS230/TCS3200 RGB sensor as I think I may be able to use that to capture the colour of the sky. Another thing I am looking at is running an IR camera module on a Pi 3 to capture time lapse images of the actual sky itself. In capturing images of the sky, it would be easy to compare the sensor readings to how the sky way at a particular time. (It may also be used to see how much stratospheric aerosol geoengineering is actually going on around me, but that is a conversation for another day!)
And that is about it for this update. I will post more as and when.
Oh, I ordered a new CAJOE RadiationD-v1.1 with J305by tube so I could do some testing alongside of the main array. I received it, put in the new tube, shone a UV torch at it.... And nothing. The new J305by I received is not light sensitive! I was surprised. Maybe it is only the older tubes that react to light. I do need to check the HV voltage on the new RadiationD-v1.1 but does work fine for radioactive sources, so I can only assume this new tube is not sensitive to light. If there is anyone that does have a J305 that is sensitive to light and would like to swap for a brand new one one that isn't light sensitive, please let me know. Obviously dependant on postage costs etc.
You can see the live/recorded data here: Solar Monitor 5 Million
Archived from radmon.org - originally posted 24/04/2024
Add Comment
This policy contains information about your privacy. By posting, you are declaring that you understand this policy:
- Your name, rating, website address, town, country, state and comment will be publicly displayed if entered.
- Aside from the data entered into these form fields, other stored data about your comment will include:
- Your IP address (not displayed)
- The time/date of your submission (displayed)
- Your email address will not be shared. It is collected for only two reasons:
- Administrative purposes, should a need to contact you arise.
- To inform you of new comments, should you subscribe to receive notifications.
- A cookie may be set on your computer. This is used to remember your inputs. It will expire by itself.
This policy is subject to change at any time and without notice.
These terms and conditions contain rules about posting comments. By submitting a comment, you agree with these rules:
- Although the administrator will attempt to moderate comments, not all comments can be moderated at all times.
- You acknowledge that all comments express the opinions of the original author and not those of the administrator.
- You will not post material which is knowingly false, obscene, hateful, threatening, harassing or invasive of privacy.
- The administrator has the right to edit, move or remove any comment for any reason and without notice.
Failure to comply with these rules may result in being banned from submitting further comments.
These terms and conditions are subject to change at any time and without notice.
Comments